Web is the dominant platform for applications. Web-enabled devices can be found everywhere, including laptops, smart phones, and tablets. Web applications must be interactive and intuitive. If applications are slow, clunky, or difficult to use, they only create more of a problem instead of solving one.
JavaScript (JS), officially known as ECMAScript, was created to help solve these problems. All modern browsers have a JavaScript interpreter built in, meaning JavaScript applications can run in almost any browser. In addition to providing interactive front-end elements, there's Asynchronous JavaScript and XML (AJAX). AJAX is a set of technologies which allows web pages to change asynchronously, such as loading new data on the page.
Finally, JavaScript can be used on the backend to provide a server-side JS environment. For example, NodeJS has recently gained popularity and is designed to build scalable network applications as an asynchronous event driven JavaScript runtime environment. The majority of JavaScript is best known as a client side code that runs in a browser. The APIC GUI as an example is a JavaScript application. Every time you point your browser to the APIC GUI, code is downloaded from the server into your browser and executed.
Why do developers pick JavaScript instead of Python, or PHP for web application development? Mostly because server side code tends to be a "run once" delivery method. The client connects to the server, the server processes some task, then returns data back to the client, usually in the form of a series of HTML web pages. These pages are rendered by the client and the process finishes. In JavaScript, code is pulled and runs based on the client's actions within the browser. These can be clicks, scrolls, hovers or other available interface actions.
One example is displaying a table of endpoints, which we will build, and by using JavaScript libraries the table can become interactive. This enables the searching and sorting of the table without contacting the server, because the data resides within the client browser.
cd ~/ltrdcn-3225/jsapps/ep-viewer
If you've been working with JavaScript for a while, you might have heard of NPM (Node Package Manager). NPM makes it easy for JavaScript developers to share code they've created, and for others to reuse that code in their own applications. When depending on code from other developers, npm also makes it easy to check if updates have been made, and to download those updates when they're available.
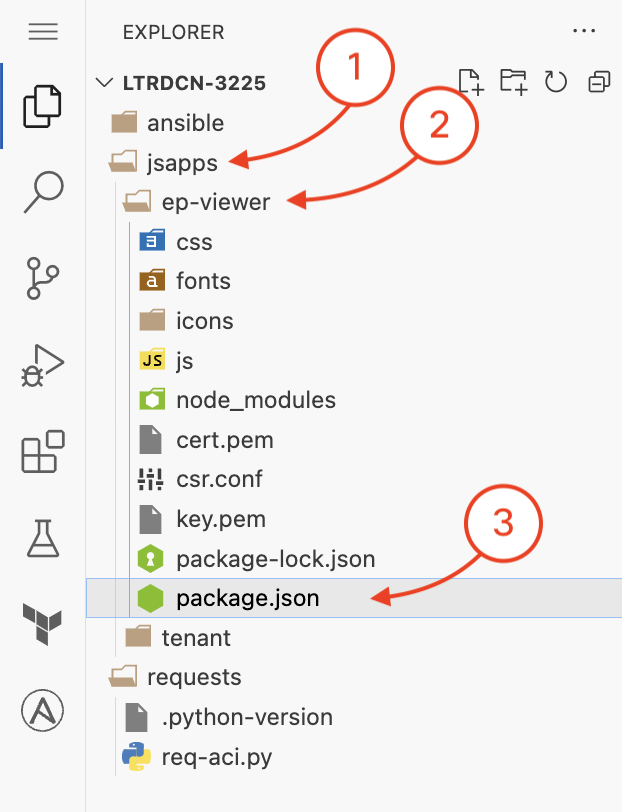
These pieces of reusable code are called packages or modules. A package is simply a directory with one or more files, one of which is package.json and contains metadata about the package. A typical application, such as a website, can depend on dozens or hundreds of packages many of which are small. The general idea is to create a small building block which solves one problem well. This makes it possible to compose larger, custom solutions out of these small, shared building blocks.
Initialize the application with npm.
npm init
Use default options by hitting 'Enter' then typing 'yes' at the end
If you get a warning about the NPM version having a newer release, this isn't a problem.
This creates a single package.json file containing the metadata for our application,
which we'll build on over time. You can view the contents of the file package.json.
cat package.json
{
    "name": "ep-viewer",
    "version": "1.0.0",
    "description": "",
    "main": "index.js",
    "scripts": {
      "test": "echo \"Error: no test specified\" && exit 1"
    },
    "author": "",
    "license": "ISC"
}
We can install modules using npm to help speed up development. We'll be using http-server as a development server for our web app.
Issue the following command:
npm install http-server --save-dev
Once completed the file package.json should have been updated.
cat package.json
{
    "name": "ep-viewer",
    "version": "1.0.0",
    "description": "",
    "main": "index.js",
    "scripts": {
      "test": "echo \"Error: no test specified\" && exit 1"
    },
    "author": "",
    "license": "ISC",
    "devDependencies": {
      "http-server": "^14.1.1"
    }
}
When it comes to applications running Javascript, a browser introduces a series of concerns that you must be aware off. Browsers to Servers communications have many years of experience surring security concerns and require specific configurations and setups.
One such setup that you must be aware is that you have to establish connections on the same transport. If you are using HTTP ( non secure ) then everything must be HTTP. You can't have aspects of your code HTTP and other aspects HTTPS. For example. If your browser is connected to a local server that is running HTTP and the javascript code attemps to connect via HTTPS to some other server, the connection will be rejected.
The following diagram attempts to represent this visually:
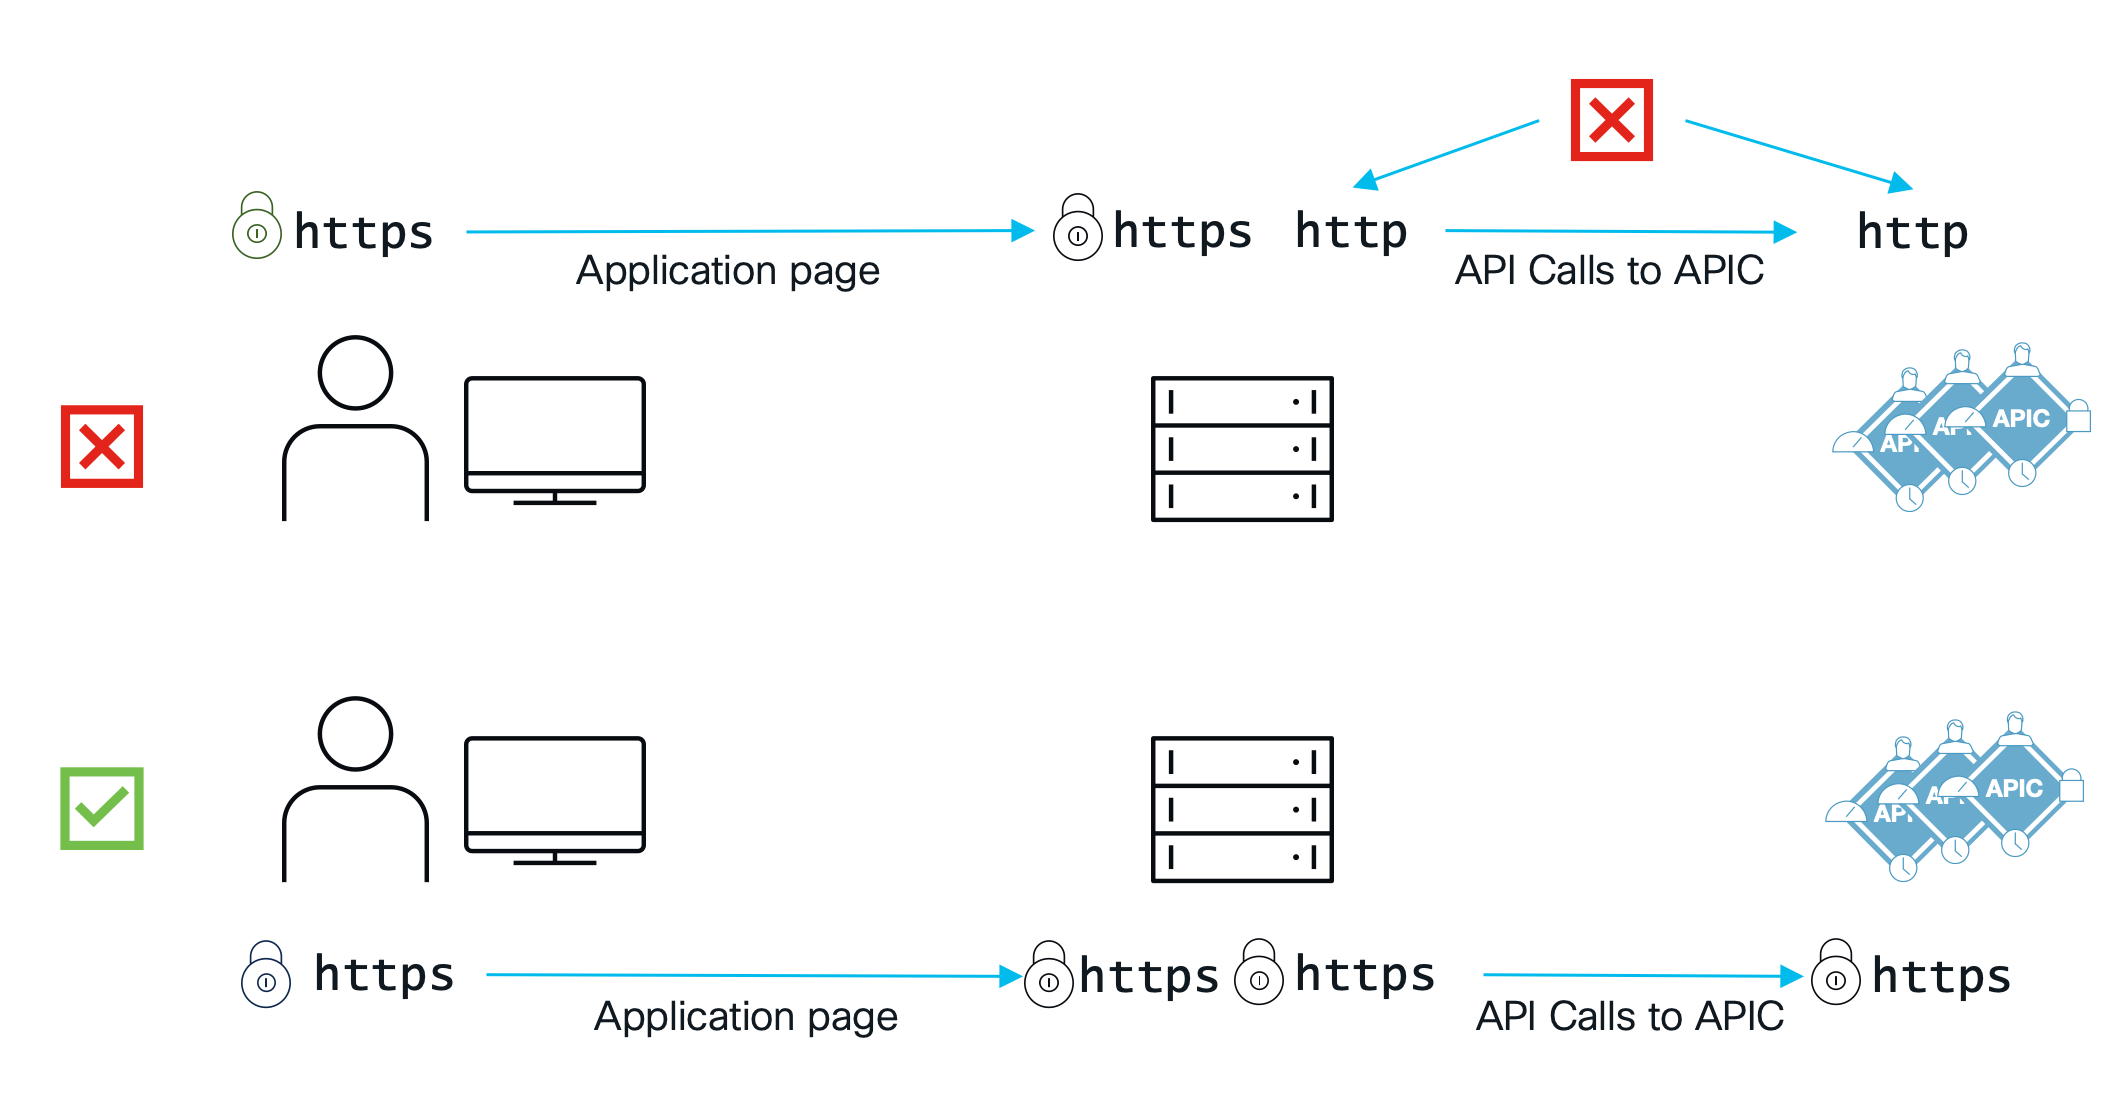
For this reason in this lab we are going to establish a local HTTPS server so that we can properly utilize HTTPS based connections to the APIC for an established secure solution.
openssl req -newkey rsa:2048 -new -nodes -x509 -days 365 -keyout key.pem -out cert.pem -config csr.conf
In the IDE modify the package.json file by adding the following lines to the scripts object.
Don't forget to include the comma on the line above for correct JSON syntax.
{
    "name": "ep-viewer",
    "version": "1.0.0",
    "description": "",
    "main": "index.js",
    "scripts": {
      "test": "echo \"Error: no test specified\" && exit 1",
      "dev": "http-server -c-1 -S -C cert.pem -p 9004"
    },
    "author": "",
    "license": "ISC",
    "devDependencies": {
      "http-server": "^14.1.1"
    }
}
Make sure to include the comma (as shown on line 7) for correct JSON syntax.
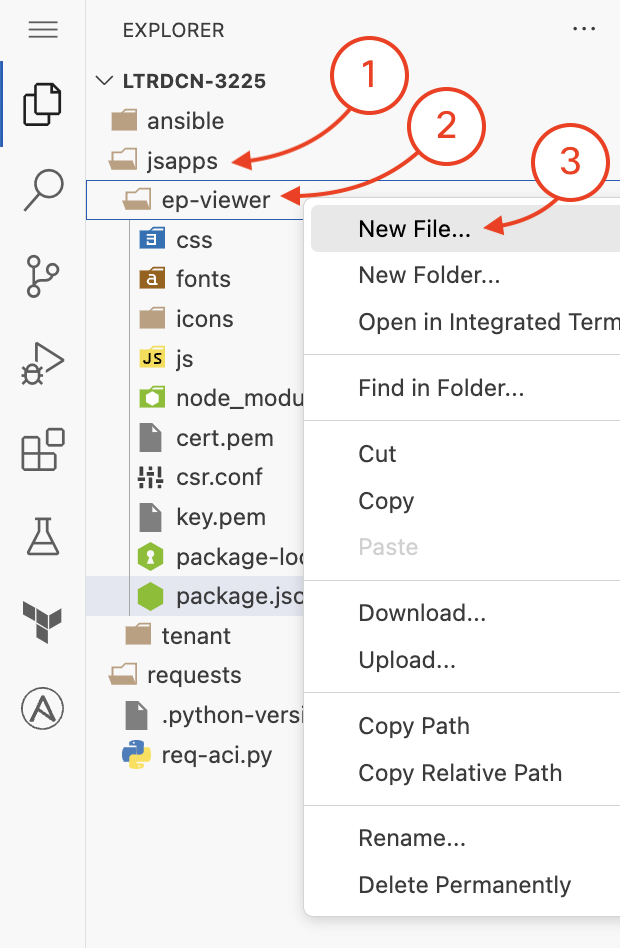
In this same directory you will create another file, in this case an HTML file. It will be named index.html containing the following. Add the following HTML structure to the file and save.
<!DOCTYPE html>
<html>
    <head>
    </head>
    <body>
      <h1>Hello World!</h1>
    </body>
</html>
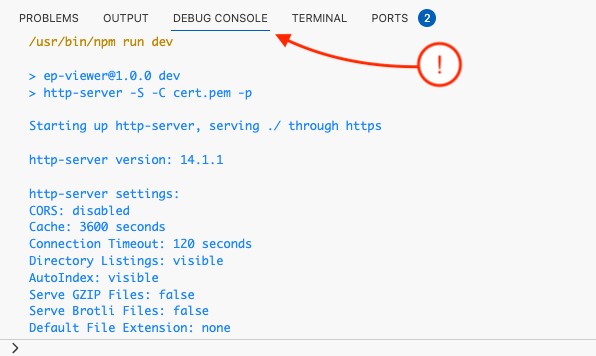
We have setup the IDE you are using to run these different applications. This is known as a debugger and is used by developers for local environment coding and testing.
On the top there is a selection that will have two separate options.
EP Viewer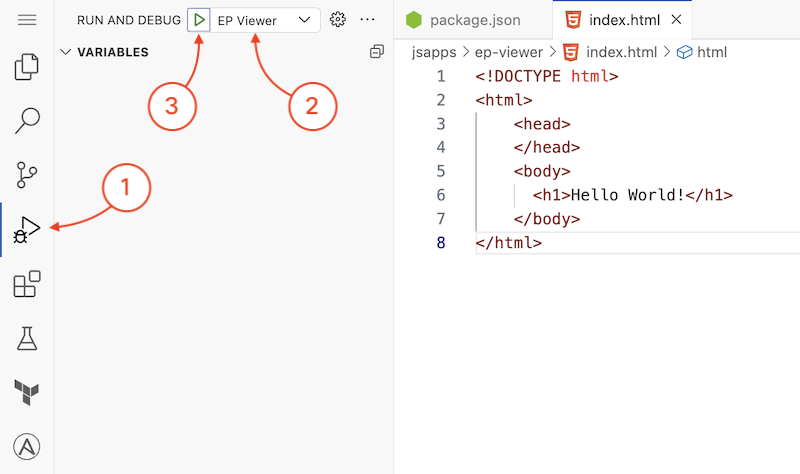
Click on https://10.0.226.241:9004 to open the page. You are going to be prompted due to the self signed certificate. Click on Advanced and then Proceed
You can see the debug console in the IDE by clicking debug console right besides the Terminal in the bottom of the IDE page.