One of the things we always want to do in this lab is inspire the posiblities of the users to create applications. Sometimes it is hard to understand how exactly the ACI ReST API actually can transform network access from the perspective of simple scsripts to full blown applications that complete network tasks with ease.
When you observe the various integrations that Cisco has accomplished for OpenStack, Kubernetes, OpenShift and others you are just seeing this concept in action. That which the API is used by different integration components to configure network elements.
To show this we have built for you a more complex application in JavaScript that you will be adding some functionality to. We have already integrated login/logout to the fabric, we have transfered the endpoints code over the full foundation of the app. We just want to provide a cool place to add some code to give you an idea of what could be accomplished with ACI.
In the previous example of javascript we created a application with NPM. For this portion of the lab we are going to use NPM again in a different directory that is going to contain a set of file structures that we have built for you to accelerate this more complex version of the lab.
As we are going to shift to a different application, we will repeat some steps that we had done previously. But first we have to STOP the current debugger session.
In the IDE window there should be a little debugger control panel on the top that looks like:

Click on the last button for STOP. This should close the debugger allowing
us to start it for the new application.
Then click Terminal that is to the right of your Debug Console to return to your terminal window.

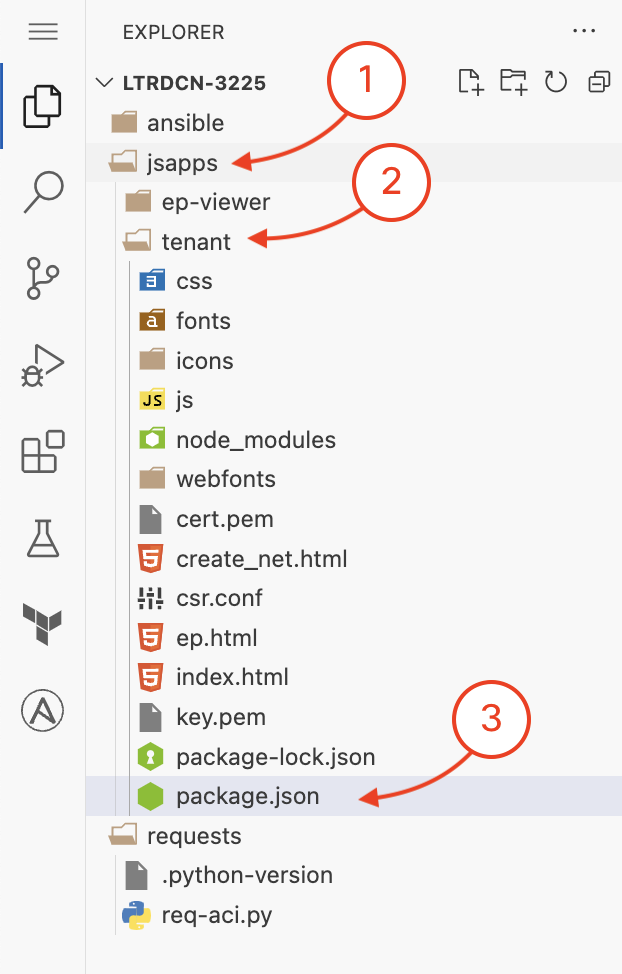
Back at the bottom of the IDE click on the Terminal window again if you haven't already. You will be working on a new directory struture that we have placed under the ~/ltrdcn-3225/jsapps. This new directory is called tenant. Under this directory is a bigger application structure. Here you have to initialize NPM for this application.
cd ~/ltrdcn-3225/jsapps/tenant
And then we will initialize NPM:
npm init
Use default options by hitting 'Enter' then typing 'yes' at the end.
Then install http-server on this NPM working environment.
npm install http-server --save-dev
Just like the previous session we have to create a local cert to start the development web-server.
openssl req -newkey rsa:2048 -new -nodes -x509 -days 365 -keyout key.pem -out cert.pem -config csr.conf
In the IDE modify the package.json file in the
~/ltrdcn-3225/jsapps/tenant
adding the following line to the scripts object. Don't forget to include
the comma on the line above for correct JSON syntax.
{
    "name": "tenant",
    "version": "1.0.0",
    "description": "",
    "main": "index.js",
    "scripts": {
      "test": "echo \"Error: no test specified\" && exit 1",
      "dev": "http-server -c-1 -S -C cert.pem -p 10004"
    },
    "author": "",
    "license": "ISC",
    "devDependencies": {
      "http-server": "^14.1.1"
    }
}
Make sure to include the comma (as shown on line 7) for correct JSON syntax.
Just as we did in the ep-viewer section, you will now run the debugger but for the tenant application.
On the top there is a selection that will have two separate options.
Tenant APP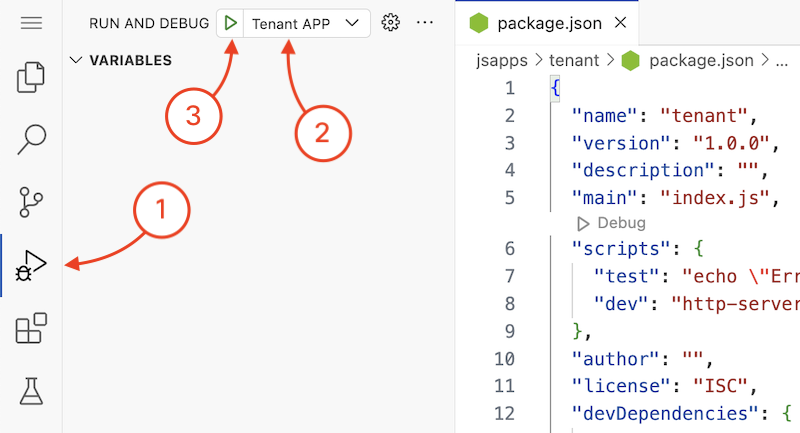
You should then be able to reach the application in the following url: https://10.0.226.241:10004 that will show you the application that you will be working on expanding functionality.

Click on the Login Form button and enter the credentials for the ACI fabric.
After that you should see some data show in the tool related to the lab ACI Fabric. We have included the same EndPoint viewer and we have some other widget type data for your pleasure. Now you will work in the create network section of this tool to configure some networks via this interface into the fabric.